
Modelling guides Brushes
Choosing brushes for model painting: size, shape and bristle type
Painting a buckle, covering a car body and drybrushing a wall are different jobs. Choose your brush for the stroke you need, the amount of paint it should carry and the space you have to work in.
Published: Updated:
Size: look at both the tip and the belly
A small number alone does not guarantee a precise stroke. A fine line needs a tip that stays together; the belly, which holds the paint, also matters if you want to sustain that stroke. A round brush with a good point can handle plenty of detail without always reaching for a 000.
For figures and small parts, a starting comparison could be a size 1 or 2 round for general work and a size 0 or 2/0 for tight spaces. This is guidance, not a conversion from model scale to brush size. For larger surfaces, look for more capacity and width.
If you have to reload every few millimetres, try a brush with a fuller belly. If the stroke spreads too wide, also check your pressure, paint load and tip condition before choosing a smaller size.
Choose the shape for the task
| Shape | When it can help | What to check |
|---|---|---|
| Pointed round | Colour layers, lines and details. | A closing point and enough paint capacity in the belly. |
| Flat or rectangular | Broad surfaces, stripes and straight edges. | The width should fit the area you are painting. |
| Filbert | Covering areas with softer edges and applying washes or filters. | A flat brush with a rounded end, rather than the point of a detail round. |
| Angled | Reaching with a corner and varying stroke width. | The sloping cut gives you both an edge and a corner. |
| Drybrush | Picking out raised detail on terrain, stone, fur or textures. | A shape and firmness designed for drybrushing. |
Pointed round: detail and everyday painting
A pointed round is a versatile brush for painting scale models and miniatures. Use the tip for buttons, buckles or small parts inside a vehicle; with a little more contact, the body covers a wider area. Look at both how well the tip comes together and how much hair sits behind it: you need precision, but also enough paint to finish the stroke.
“Round” describes the shape of the bundle of hairs; it does not necessarily mean a blunt tip. For detail painting, look for a well-defined point. A rounded or domed brush, such as some drybrushes, handles differently.
Flat: surfaces, stripes and edges
The straight end makes broad strokes. It can be useful for covering a panel, painting a door on a model building or adding stripes to an accessible surface. Turn it onto its narrow edge to make a thinner mark. Match its width to the part: an oversized flat makes it harder to work around mouldings and other raised details.
Filbert: a flat brush with a rounded end
A filbert combines a flat body with an oval tip. You can use it to spread colour over curved areas and produce a less square end to the stroke, for example on a broad area of a figure. It can also be useful for washes. The shape alone does not blend paint: the result also depends on the load, dilution and whether the paint layer is still workable.
Angled: use the edge and the corner
The hairs are cut on a slant. The longer corner lets you approach narrow areas, while the edge gives a broader stroke. On a model, you might try it beside a frame or along an edge you want to highlight. You do not need one from day one: add it when that shape makes a particular job easier.
Short detail brushes and long liners: different kinds of control
A short-haired detail brush, sometimes called a spotter, is handy for small, localised touches. A long-haired liner or rigger is designed for continuous lines, such as a thin stripe or a freehand decoration. The longer hairs flex differently, so practise the movement before using it on your model. Neither automatically replaces your general-purpose round.
Drybrush: working across raised detail
To pick out stonework, wood grain or texture on a miniature base, choose a brush intended for drybrushing. Flat and rounded shapes are available in different degrees of firmness. Remove most of the paint, then brush gently over the raised areas. Pick a head that can reach the texture without catching everything around it, and test it on a spare piece first.
Keeping a separate drybrush saves your fine detail brush from repeated rubbing. An old brush can be useful for certain effects, but splayed or distorted hairs do not necessarily behave like a purpose-made drybrush.
For example, the Vallejo Effects size 4 (B04004) is flat and synthetic; the Shader size 2 (B06002) is a synthetic filbert. They do not make exactly the same stroke, even though both are flat brushes.
Natural hair or synthetic fibres: what changes as you paint?
Before comparing materials, consider three qualities. Paint capacity means how much paint the brush holds and how it releases it. Flexibility describes how far the hairs bend against the part. Spring is their ability to return to their original shape when you release the pressure. You notice these differences when drawing a line, filling an area or applying a thin layer.
Synthetic brushes: for starting out and painting beyond the basics
Synthetic filaments are made from materials such as nylon or polyester and can vary greatly in thickness and handling. Some brushes are soft, others firm, and some ranges aim to imitate particular natural hairs. It is therefore unhelpful to assume that all synthetics have the same stiffness or paint capacity.
A synthetic round with a good point is a practical choice for learning to paint with water-based acrylics and for everyday model painting. A flat adds options for larger surfaces. Some acrylic ranges are designed for durability and shape retention, but you still need to rinse them during the session and prevent paint from drying among the hairs.
Sable and Kolinsky: a fine point with paint capacity
A good sable or Kolinsky brush can combine a fine point with a body that holds paint. That combination is useful when you want a controlled stroke without constantly reloading. For miniature painting, it may be worth trying for detail and thin layers once you are comfortable with paint dilution and brush care.
Kolinsky is a specific description, not another word for any natural hair. Nor does “sable” alone guarantee a particular quality: hair selection and manufacture matter. Check the composition and intended use of the range. You do not need a Kolinsky to get started, nor must you reserve it for just one type of detail.
Blends of natural hair and synthetic fibres
These combine both materials in one brush. Some ranges aim to balance the paint retention of natural hair with the spring of synthetic fibres and a more accessible price. They can be an option for general painting, but the blend and design matter: a mixed brush is not automatically halfway between two particular brushes.
The technique matters too
For tiny dots and lines, prioritise a tip that stays together. For broader layers, consider capacity and a comfortable width. For drybrushing or texture work, choose a suitable shape and firmness. If you use enamels, oils or solvent-based cleaners, check the range’s compatibility; a synthetic brush is not automatically suitable for every product.
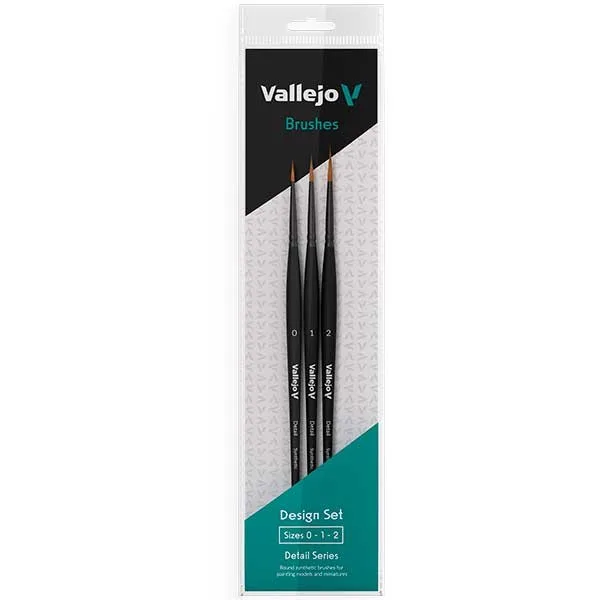
In our catalogue, you can compare the synthetic Vallejo Detail size 1 (B02001) with the natural-hair Pro Modeler size 1 (B01001). Vallejo describes the latter as natural hair, without identifying it as Kolinsky in the documentation consulted.
Are synthetic brushes cheaper?
Affordable synthetics are common in beginner ranges. There are also professional synthetic ranges and natural-hair brushes at very different prices. Size, range, build quality and hair type all matter: comparing a large flat with a small detail round tells you little about the cost of the material alone.
If you are starting out, we suggest buying a few brushes that do different jobs. Before spending more, identify what you want to improve: a point that spreads, too little paint capacity or a shape that does not suit the part. Also check whether dried paint in the ferrule, too much pressure or unsuitable dilution is causing the problem.
Keep suitable tools for drybrushing, applying pastes and mixing paint. An expensive detail brush does not necessarily offer an advantage for those jobs. Your budget is usually better spent when each brush has a clear purpose and is kept in good condition.
A small selection to get started
For brush painting with water-based acrylics, the following can be a starting point. Adjust the sizes to the parts in front of you:
- A size 1 or 2 round with a good point. For most work on figures and small parts.
- A small round, size 0 or 2/0. For tight spaces and isolated details.
- A flat of suitable width. To cover surfaces without so many tiny strokes.
- A dedicated drybrush, if you plan to use that technique. Choose the size to suit the raised detail.
Before buying a set, check the shapes included. Several tiny rounds will not replace a flat if your next task is a car body or a wall. Browse our Vallejo brushes to compare the options.
Choosing brushes for your project
Use these suggestions as a starting point for your shopping list. Match the size to the actual parts, rather than only to the scale printed on the box.
I am painting my first scale model
Start with a pointed synthetic round for small parts and a flat for surfaces it can comfortably cover. Add a smaller brush when the first one cannot reach a particular detail. You can build up your selection after a painting session, when you know which shape or size you missed.
I want to paint figures and miniatures
Pair a round with some body for clothing and larger areas with a brush that lets you work on eyes, straps or decoration. Avoid choosing only tiny brushes: a fine point with enough paint capacity can be more comfortable for a continuous line. If you want to try natural hair, compare a suitable detail brush with the synthetic you already know.
I am painting buildings, bases and scenery
A flat can help spread colour over walls, while a round reaches windows and small features. Add a drybrush if you want to bring out stone, wood or ground textures. Keep a separate brush or suitable tool for adhesives and texture pastes, rather than using your detail brush for these materials.
Care for the tip from the first session
- Keep paint from reaching and drying inside the ferrule, the metal part that holds the bristles.
- Rinse as you work and clean afterwards. Do not let water-based acrylic paint harden in the fibres.
- Do not leave the brush resting on its tip in the water jar. After cleaning, gently reshape it and let it dry horizontally.
- Use another brush for stirring paint, applying glue or working with pastes and textures.
To assess your choice, try a line, a small filled area and a curve on a test surface. Judge whether you can control the stroke and whether the paint capacity lets you work comfortably.
Choose the brush for the job in front of you
Compare shape, material and size, then look at the paints for your project.